As an administrator, if your district purchased Classcraft, then you can view and assign Classcraft licenses to your districts and schools by school. Once you grant access, the teachers and students in the selected schools and grades can see Classcraft when they log in to HMH Ed™.
Note: To renew subscriptions for your organization's products, contact Customer Service or your HMH Account Executive (AE).
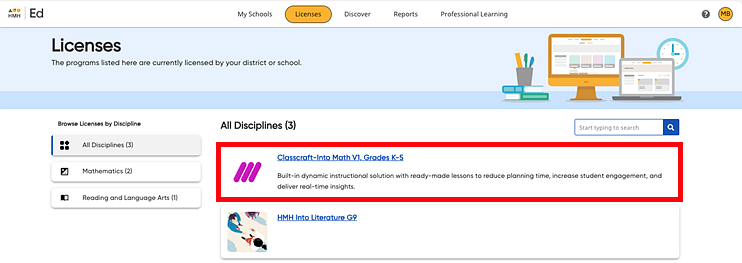
1. In the banner, click the Licenses tab. The Licenses page appears. All the HMH products and Classcraft programs purchased by your organization appear on this page displayed as individual cards.

2. Locate a specific Classcraft program card using any of the following options:
– Scroll through the alphabetical list.
– Use the forward and back arrows to navigate from page to page.
– Use the
search field by typing a program name or keyword and then select an option
from the list or click the search icon ![]() to see the list
of options matching your search criteria.
to see the list
of options matching your search criteria.
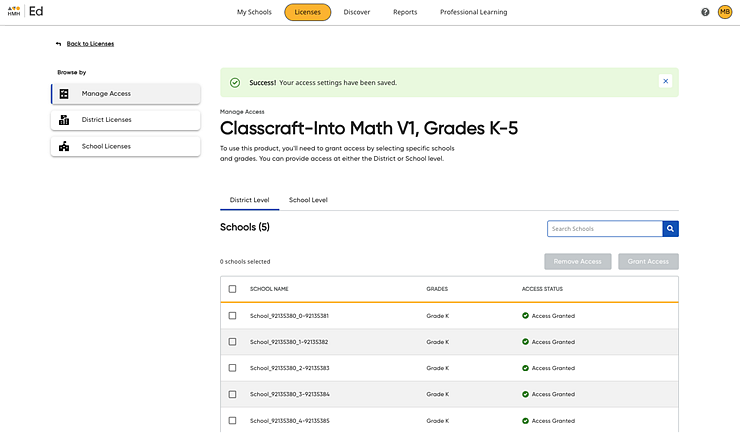
3. Click a title in a Classcraft program card to view and manage licenses. The Manage Access page for the Classcraft program appears showing the list of schools.
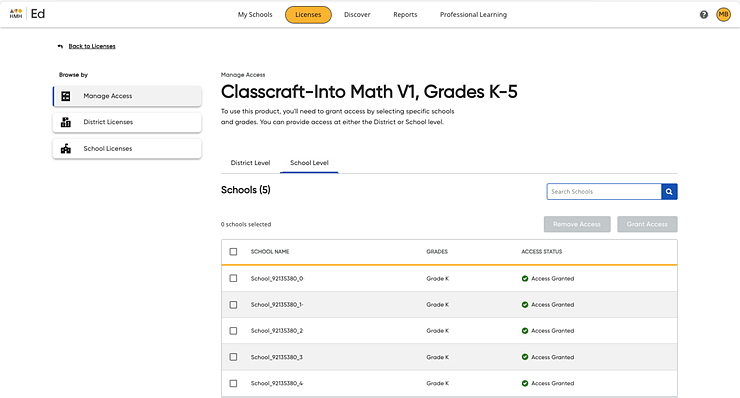
– If you are a district administrator, you can view and assign district-level or school-level licenses across your district. The page opens to the District Level list of schools; use the District Level and School Level tabs to view the school lists, as needed.

– If you are a school administrator, you can only view and assign school licenses purchased for your school.

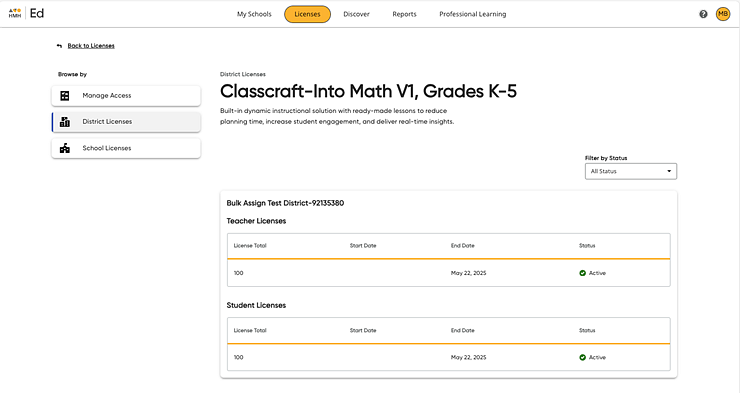
4. If necessary, view the available licenses by clicking District Licenses or School Licenses in the left Browse by panel. The District/School Licenses page for the Classcraft program appears.
The District/School Licenses page displays a table showing the school or district's total number of teacher and student licenses for the selected Classcraft program; the table breaks down the total, assigned, and available licenses, the end dates for those licenses, and the status of each license.

5. Click Manage Access in the left Browse by panel to return to the Manage Access page.

6. If necessary, sort or search the list using any of the following methods:
– In the search field, enter all or part
of the school name and click the search icon ![]() . The
list narrows to the schools that matches your entered criteria.
. The
list narrows to the schools that matches your entered criteria.
– Click the School Name column title to sort the list by that column.
7. In the school list, select the check box for the school(s) to be assigned licenses, and then click the Grant Access button.
Note: A maximum of 1000 schools can be selected at a time.
A Grant Access dialog box appears.
In this dialog box, you can specify the grade-level access to be granted for each of your selected schools.
8. In the Grant Access dialog box, do the following: – In the Select School list, select the schools to be granted access.
– In the Select Grade list, select the grade level(s) for the selected schools to be granted access.
– If necessary, click Remove for a selected school or grade to remove it from the list.
– When the list is complete, click the Save and Update button.
Your selections are saved, and your Manage Access table updates to show your new selections.
|
|
|
The teachers and students in your selected schools and grades can see the Classcraft program the next time they log in to their accounts.