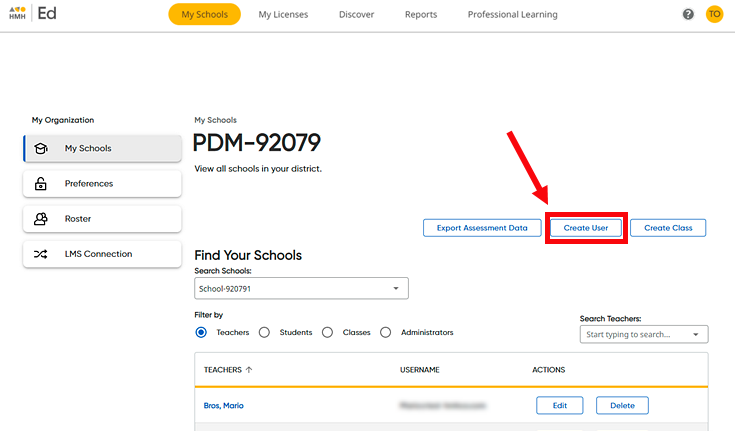
1. On the My Schools page, click Create User.

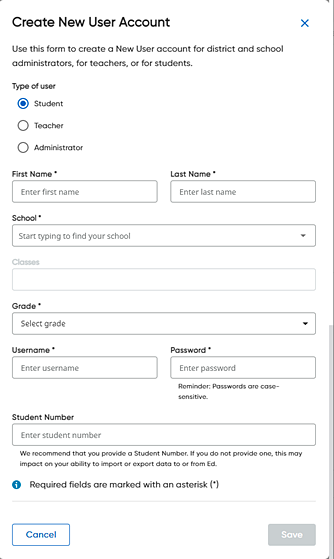
The Create New User Account dialog box appears.
2. For Type of user, click the Student option button.

3. Complete the add new student fields as follows.
Field |
Action |
First Name |
➔ Type the student's first name. |
Last Name |
➔ Type the student's last name. |
School |
➔ Select the school from the School list. Note: For school administrators, this field defaults to their school. |
Classes |
➔ (Optional) Select the student's class or classes from the list. |
Grade |
➔ Select the student's grade from the list. |
Username |
➔ Type the student's username. |
Password |
➔ Type the student's password. The password is case-sensitive and must be at least five characters. Note: See Passphrase Recommendation for more information on setting up passwords. |
Student Number |
➔ (Optional) Type the student's number. Note: After the student account is created, the Student Number field cannot be edited. |
4. Click Save. A message appears to inform you that the student has successfully been added.

The student is added to the selected school.
5. Click the X to close the message.
See Also:
View and Edit Student Information