Ed allows administrators to manage the Program Settings for individual classes within their district or school.
As a district or school administrator, this feature gives you the ability to troubleshoot class setup issues for teachers and students when programs are not associated to classes as expected.
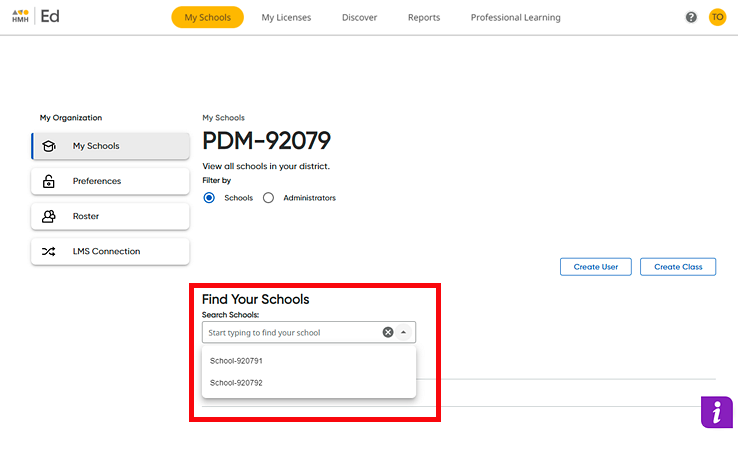
1. On the My Schools page, click the Schools option button (which is the default) and then select a school as follows.
– If you are a district administrator, select a school from the list of schools.

The page for the school appears and defaults to the Teachers page, which lists all of the teachers associated with the selected school.
– If
you are a school administrator,  the
Teachers page is the first page
that appears.
2. In the Filter by area, click the Classes option button. The Classes page appears listing all classes for the selected school, the lead teacher (if any) for each class, and the grade level associated with each class.
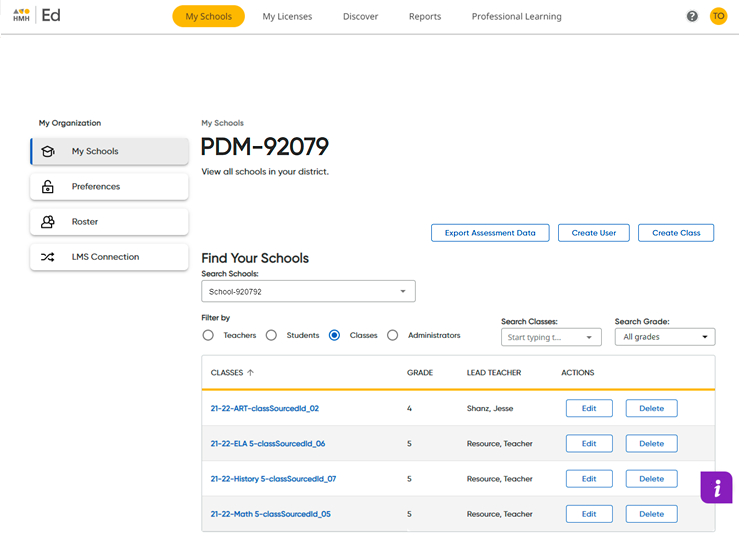
3. If necessary, search for the class by doing any of the following:
– In
the Search Classes
list,  type
all or part of the name of the class.
– In
the Search Grade
list,  click the
down arrow and select a grade level.
The list of classes that meet your search criteria displays on the page.
4. In the CLASSES column, click a class name link. The Class Overview page appears showing the class details and listing the programs (if any) and students associated with the selected class.
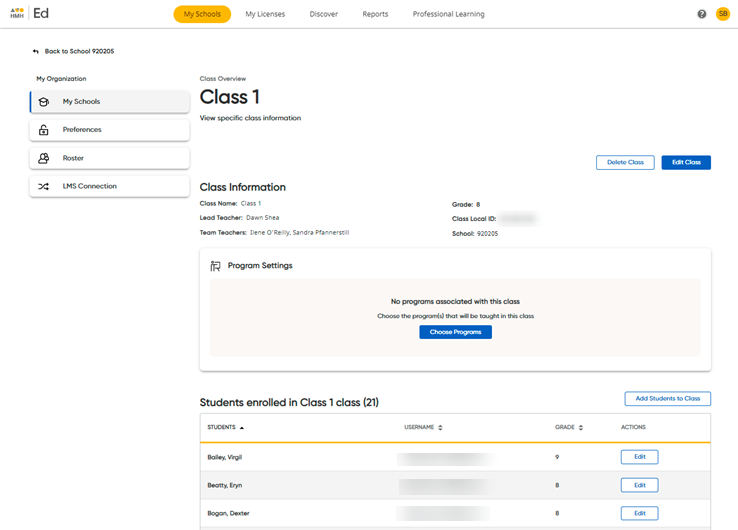
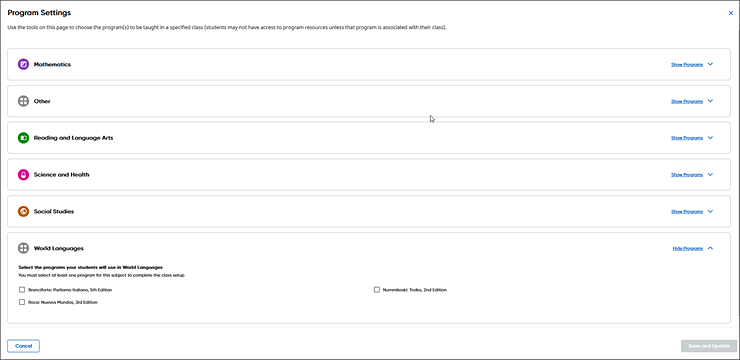
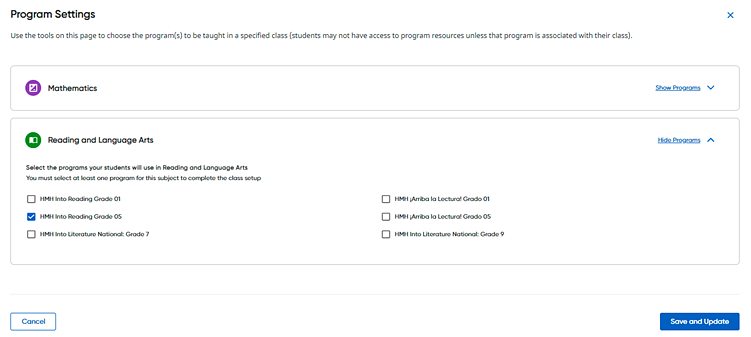
5. On the Class Overview page, click the Choose Programs or Program Settings button (depending on whether any programs are already selected). The Program Settings page appears listing all the available programs purchased by your district. Individual programs are displayed in boxes grouped by subject.
6. In a subject box, click Show Programs to view the list of available programs for that subject. Each program has a corresponding check box to indicate whether it is selected for this class.
7. For
each program, select the check box  for the classes
that should have access and, if necessary, clear the check box
  for the classes that should
not have access.
The settings are as follows:
On = 
Off = 
When you make changes on the page, the Save and Update button in the lower right corner of the page is enabled.
8. Click Save and Update to save the changes. The Class Overview page appears with a dialog box confirming that you have successfully saved the changes to the class programs.
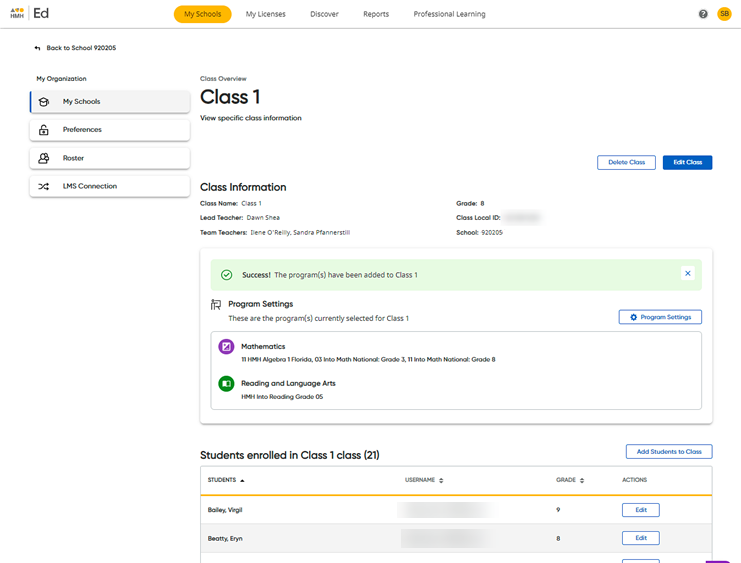
Teachers and students for this class can now access the selected programs.