From a single-assessment report, you can allow Ed to sort your students into three groups based on the student scores.
1. Open a report for an assessment by doing either of the following:
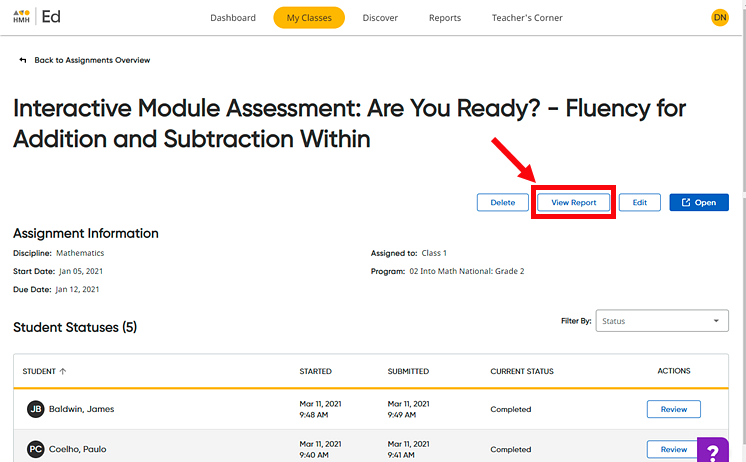
– On the Assignments Overview page, locate the assessment, click to open the Assignment Details page for that assessment, and click View Report. (The View Report button appears only if the selected assignment is an assessment with data to report.)

Or
– On the Reports tab – Assessment Report page, click to open the report for a specific assessment. (See Open Assessment Reports for details.)
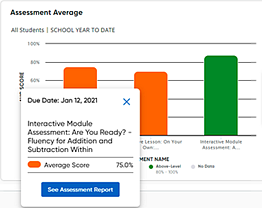
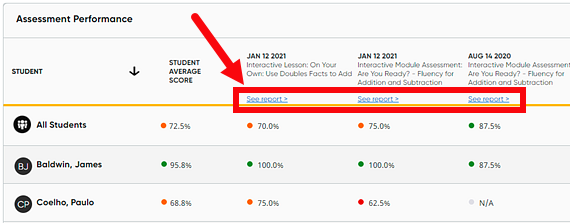
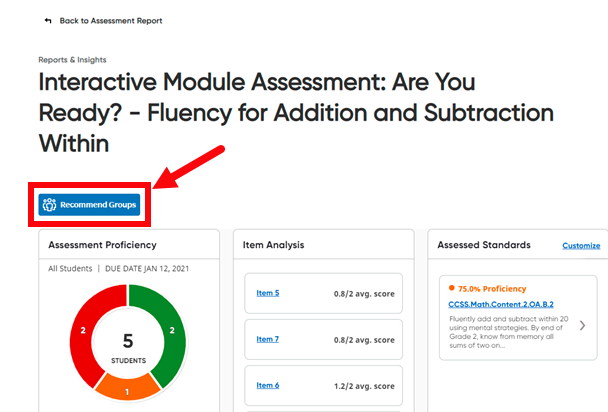
The Reports page for the selected assessment appears.
2. On
the Reports page, click  .
.
The Create Groups page opens and shows that Ed automatically sorted students into three groups.
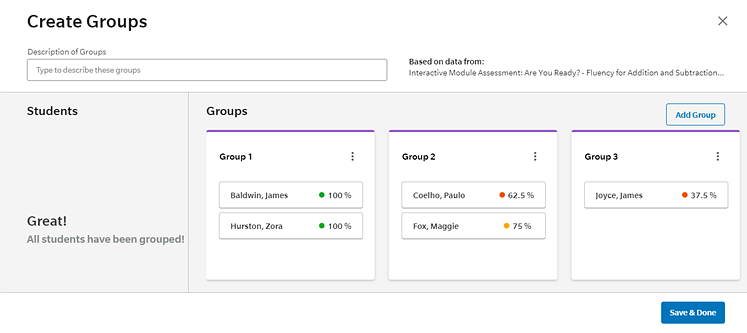
Note: ● Students are sorted into three groups based on their assessment scores. ● Each group contains the same number of students, unless the class consists of an uneven number of students, in which case more students are placed in the higher-performing group. ● Only students with data are placed in groups, so students who have not taken the assessment or who were not assigned the assessment remain in the Students column. |
3. If needed, make manual adjustments to the groups, as follows:
Action |
Steps |
Describe the groups |
➔ In
the Note: If you have multiple groupings for the same class, the Group Description allows you to quickly differentiate between them. |
Add more groups |
➔ Click
|
Delete groups |
➔ Click
the |
Rename groups |
➔ Click
the or ➔ Click
the |
Move students |
➔ Move
a student or students from one group to another by |
Remove students |
➔ Remove
students to groups by |
Add students |
➔ Add
students to groups by |
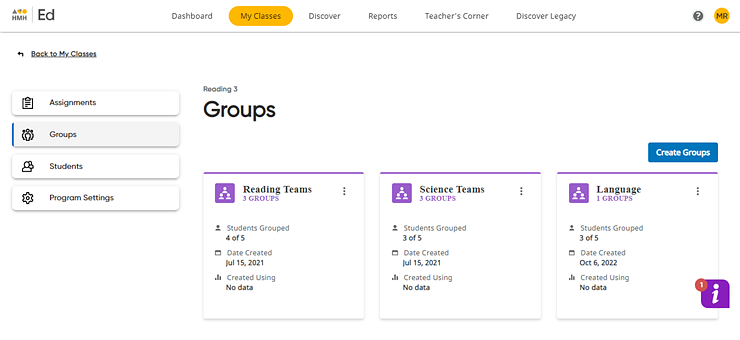
4. In the lower right corner of the page, click Save & Done to save the groups. The newly created group display on the Groups tab along with all the groups that were previously created for the selected class.
The Created Using section of the group card identifies the assessment that was used to sort the students for this group. If this section states "No data," then the group was created by sorting students manually.
See Also: