If you have a Virtual Classroom option in My Classes, you can schedule an online video learning session with your classes.
Note: The video conference option is only displayed for teachers if the district administrator has enabled this setting.
➔ View an instructional video by clicking the following link: |
Using the Virtual Classroom (Video 2:37) |
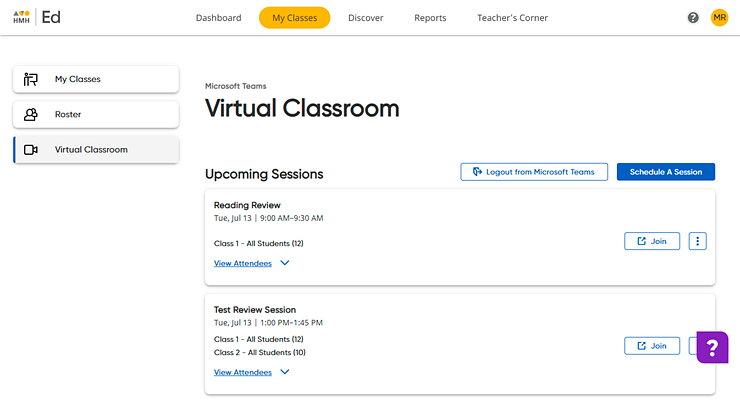
1. Click the My Classes tab, and then in the left panel, click the Virtual Classroom link. The Virtual Classroom page appears. listing scheduled sessions for all of your classes displayed in chronological order.

2. If you are not logged in to your district's selected service provider (Google Classroom or Microsoft Teams), click the Log in link and follow the provider's instructions to log in and accept terms and conditions.
The list box updates showing any upcoming virtual learning sessions that you have scheduled offering you the option to schedule a session.
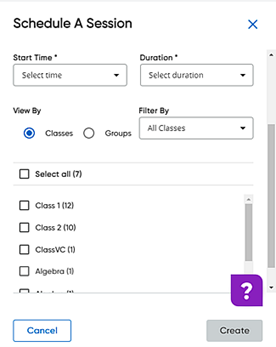
3. Click Schedule A Session. The Schedule A Session dialog box appears.

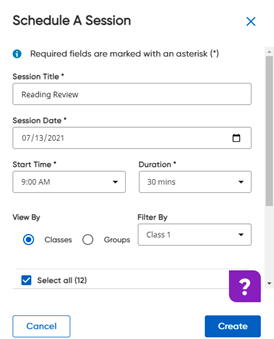
4. Type a title for the session, and then select the date, time, and duration for the session.

5. Scroll down the Schedule A Session dialog box to see the View By / Filter By section. By default, Classes is selected and all of your classes are listed.
6. Select the students to be included in the session as follows:
Attendees |
Action |
One class |
a.
b. Select the check box of the class to include. |
Multiple classes |
a.
b. Select the check boxes of all the classes to include. |
Select students within a class |
a.
b. Click the down arrow in the Filter By list and select a class. A list of the students in the selected class appears.
c. Use the scroll bars within the dialog box to view all the students.
d. Select the check boxes of the students to include. |
Groups within classes |
a.
A list of the groups created for each of your classes appears.
b. Use the scroll bars within the dialog box to view all the classes and groups.
c. If needed, narrow the list by class by selecting a class in the Filter By list. The list changes to show only the groups in the selected class.
d. Select the check boxes of the groups to include. (For details about how to create groups, see Create Groups.) |
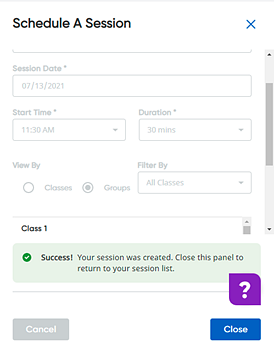
7. Click Create. The Schedule A Session dialog box confirms that the session is created.

8. Click
Close. The dialog box closes.
The session is added to your Virtual
Classroom list box and displays on the student Dashboard
( as shown here)
of the selected students.
Note: The Virtual Classroom list box includes scheduled sessions for all of your classes. Sessions are listed in chronological order.
See Also: