In addition to the HMH resources, you can construct your own custom tests and resources using a bank of items aligned to standards. Once a custom resource is assigned, it cannot be edited.
1. From the Dashboard, click the header bar in the Resources, Assignments, or Reports gadgets to open any ThinkCentral banner page.
2. In the top menu bar, click the Assignments tab, move to the Custom Resources area, and then click Add. The Create Custom Resource page appears.
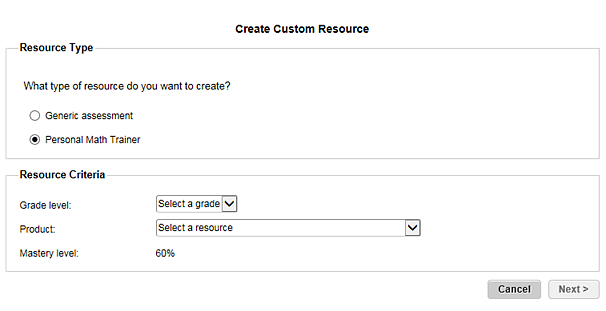
Note: The Resource Type area appears only if you have a math program that includes Personal Math Trainer (PMT) products.

3. Depending on whether you have Personal Math Trainer products, do one of the following:
– Users who do not see the Resource Type area of the page (users without PMT products), skip to step 4.
– Users who have Personal Math Trainer products, select an option in the Resource Type area, and refer to the following table to continue.
Resource Type |
Action |
Generic assessment |
a. Select a Grade level. b. Select a Subject. c. Type a Resource name. d. If the Mastery Level field is available, set the mastery level. e. Click Next. The standard set/question type page appears. f. Continue with step 4. |
Personal Math Trainer |
a. Select a Grade level. b. Select a Product. c. If the Mastery Level field is available, set the mastery level. d. Click Next. The Workflow Editor appears. The selected assessment resource opens in a separate window. e. Make the necessary modifications, and click Save. The Resource Option page appears.
f. Skip to step 9. |
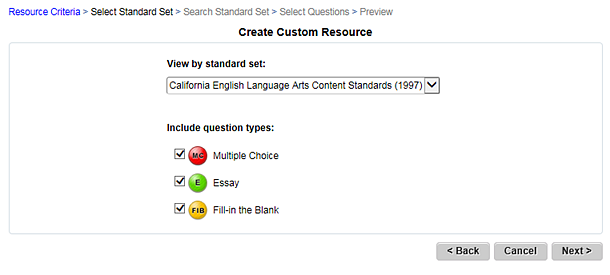
4. Select a standard set and question types as follows:

a. In View by standard set list, select a standard set.
b. If the Include question types options are available, click the check box beside one or more question types to include in the test (Multiple choice, Essay, Fill in the blank).
Note: Only the question types available in the test are listed.
c. Click Next. The search results/criteria page appears.
5. Set the standards for the custom test by selecting them from the Search Results box and moving them to the Criteria box, and then click Next. The page displaying the selected standards appears with standards organized into individual tabs.
Note: – Narrow the search results by typing a specific term in the Search by box, and then clicking Search. – Move standards by dragging them or by clicking the check boxes, and then clicking Add to Criteria. – Click the Include or Exclude button to specify whether the selected criteria is included or excluded from the test. |
6. Within each standard tab, click Expand All to view the questions available for each standard, move the selected standards or the individual questions to the My Custom Resource box, and then click Next.
Note: – Move items by dragging them or by selecting their check boxes, and then clicking Add to Custom Resource. ○ To drag standards, click and hold their texts, and then move them. ○ To drag questions, click and hold their icons, and then move them. – Click the question text links to review them. – Remove questions in the My Custom Resource box by selecting them and then clicking Remove. |
7. Preview the test or resource by doing one of the following:
– To preview the whole resource as students see it, click Student View.
– To see a detailed view of an individual question, click the question.
– To remove a question from the resource, click the corresponding Delete button.
8. Click Finish to save your custom test or resource.
9. Do one of the following:
– Click Assign to assign the custom resource. The Add Test page appears.
– Click Done. The list of custom resources appears.
Note: You can assign a custom resource as soon as you create it, or you can assign it later from the Custom Resource List page.
See Next: