Within a class, you can create separate groups of students, which allows you to assign work and resources to select groups. Students may belong to more than one group.
1. Refer to the following table to begin.
Location |
Action |
Dashboard |
a. In the upper left corner of the page, click Manage Classes. The Manage Classes page appears. b. In the My Classes area, select the class in which a group is being created, and then click the Edit Class... button. The Edit Class page appears. c. At the bottom of the page, click the Add Group... button. |
Any ThinkCentral banner page |
➔ In the top menu bar, click the Classes tab, move to the Add area, and then click Group. |
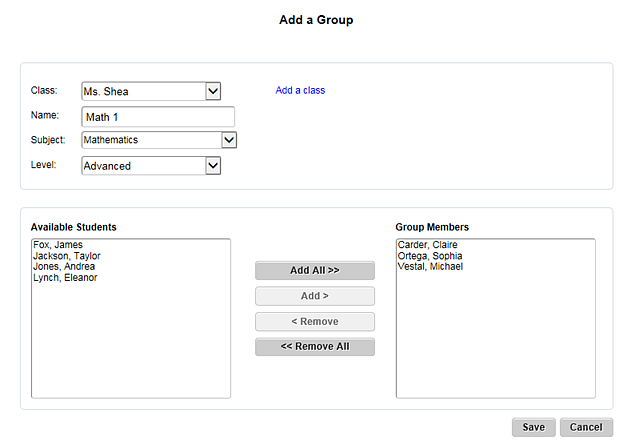
The Add a Group page appears.
2. In the Class list, select (or verify) the class in which a group is being created.
3. In the Name box, type a name for the group.
4. In the Subject list, select the subject to be identified with the group or select All.
5. In the Level list, select a level for the group.
6. Add or remove students using the Add All >>, Add >, < Remove, and<< Remove All buttons to select the student(s) to be added or removed. As you select student(s), the names move from the Available Students box to the Group Members box.
– To select multiple students, hold down the Ctrl key or Apple key on your keyboard and click the students; with all selected students highlighted, click Add >.
– To select multiple students listed consecutively, click the first student in the list, hold down the Shift key, and then click the last student in the list; the first, last, and all students in between are highlighted. Click Add >.
7. Click Save. The Edit Class page appears with your newly created group listed in the Groups area.
See Also: