Note: Administrators may restrict teachers' ability to add or edit information. If you do not have access to add or edit classes, the data permissions for these options are turned off by your district, so you must contact your administrator to request updates.
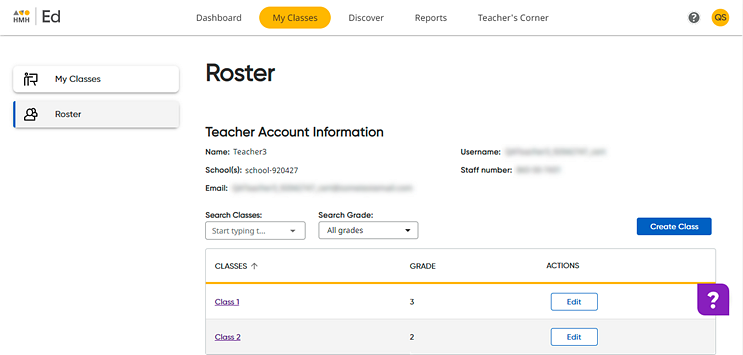
1. In the Ed banner, click the My Classes tab, and then on the left panel of the My Classes page, click Roster. The Roster page appears.

2. Locate the class to be edited; if necessary, narrow the list of classes using the Search Classes and Search Grade fields.
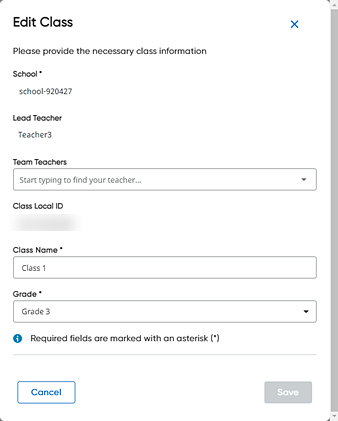
3. Click Edit in the ACTIONS column. The Edit Class dialog box appears.
Note: If necessary, open the Students page (by clicking the class name in the CLASSES column). Information about the class and the list of students enrolled in the class appears. An Edit Class button is available on that page that also opens the Edit Class dialog box.

4. Edit the class as needed:
– Team Teacher –
Add team teachers by selecting names from the list; remove a team teacher
by clicking the Remove button
of a listed team teacher  .
.
Note: The lead teacher and the team teachers both have the same capabilities to manage classes, including adding and removing students and creating assignments.
– Class Name – Type a new class name.
– Grade – Select a class grade from the list.
The ClassLocalID field cannot be edited.
5. Click Save. The class information is updated.
See Also: