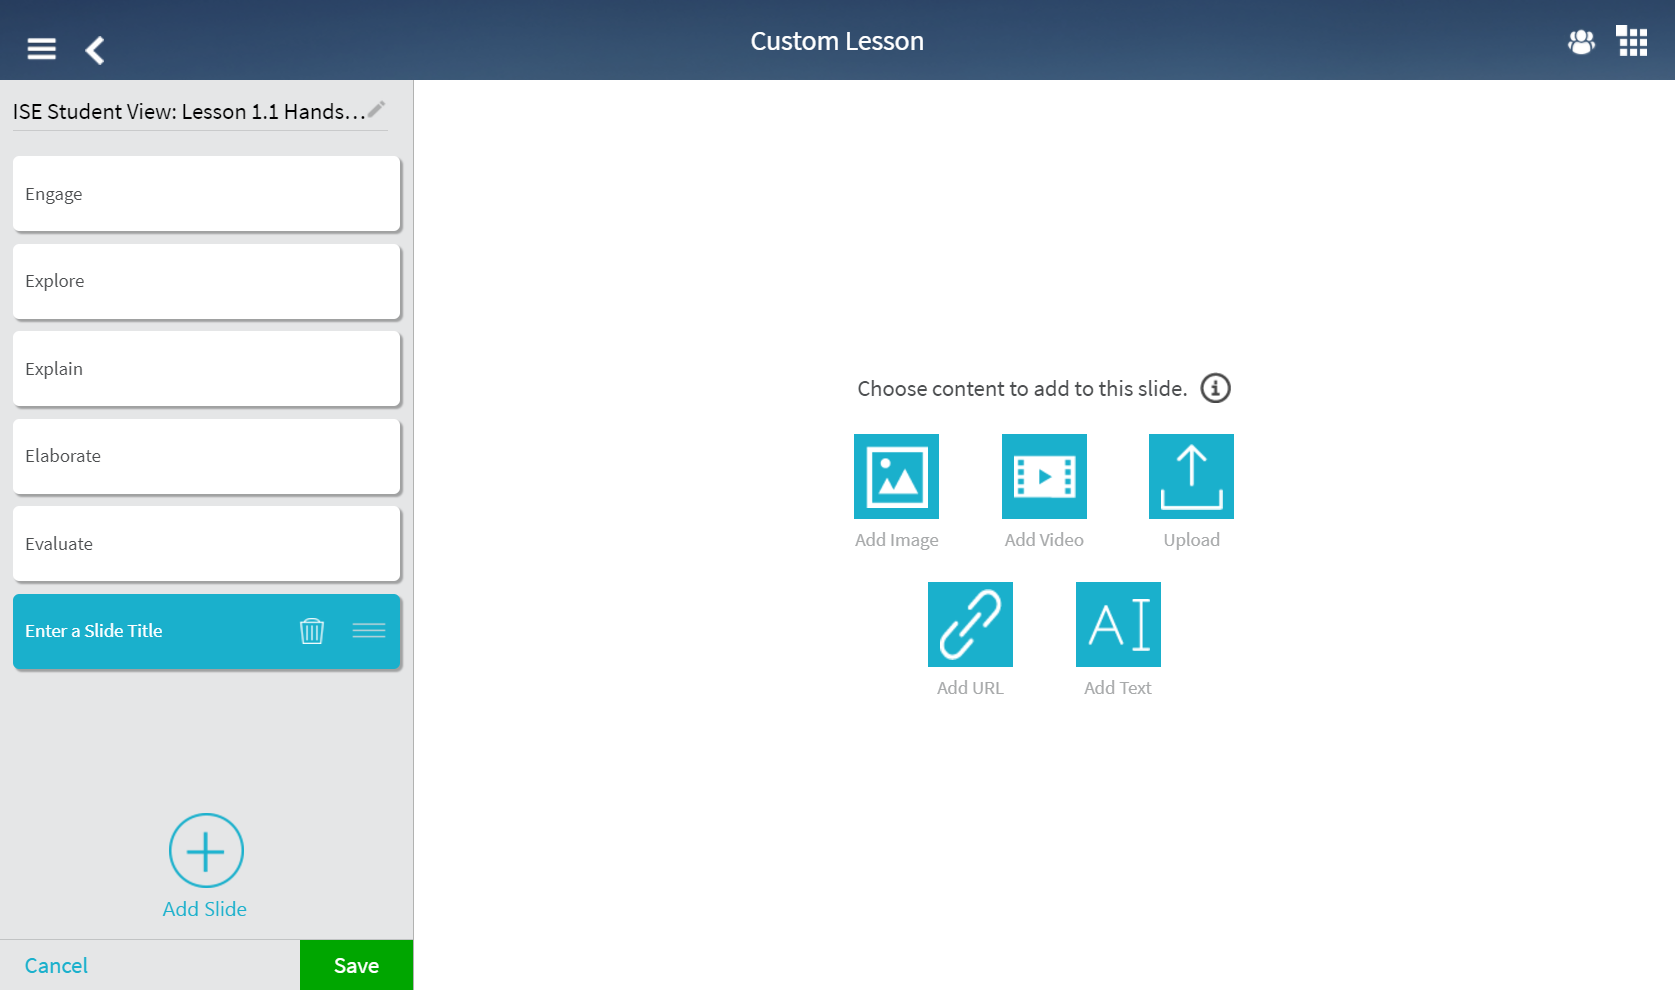
There are five types of content you can add to a lesson. Tap a content type below for detailed steps.
![]()
![]() Image:
Find and add images from the Internet. The HMH
Player image search is powered by Bing image.
Image:
Find and add images from the Internet. The HMH
Player image search is powered by Bing image.
To add an image to a lesson slide:
1. Navigate to the appropriate lesson and tap Add Slide. A blank slide appears.
2. Type lesson and slide name titles as appropriate. The titles appear as typed.
3. Tap Add Image. A blank side appears with a Search for images field.
4. Type
a search term or topic in the Search
for images field and tap the search icon  .
The search results appear in the slide workspace as thumbnails.
.
The search results appear in the slide workspace as thumbnails.
5. Scroll
to find the appropriate image and tap the preview icon  in the lower left corner of the thumbnail to review the image content.
The image expands to fill the slide workspace.
in the lower left corner of the thumbnail to review the image content.
The image expands to fill the slide workspace.
6. Confirm the image displays the expected content and repeat the preview process, as needed, to find the appropriate image.
7. Tap Insert to complete the entry task and apply the video for the slide. The slide refreshes and the Edit and Remove buttons appear allowing you to change the slide contents.
8. Click Save to store the slide contents and continue with the actions to Create and Manage Lessons.
![]()
![]() Video: Discover
videos to embed in your lesson using YouTube video search.
Video: Discover
videos to embed in your lesson using YouTube video search.
To add a video to a lesson slide:
1. Navigate to the appropriate lesson and tap Add Slide. A blank slide appears.
2. Type lesson and slide name titles as appropriate. The titles appear as typed.
3. Tap Add Video. A blank side appears with a Search for Video field.
4. Type
a search term or topic in the Search
for Video field and tap the search icon .
The search results appear in the slide workspace as thumbnails.
5. Scroll
to find the appropriate video and tap the preview icon
in the lower left corner of the thumbnail to review the video content.
The video expands to play full screen in the slide workspace.
6. Confirm the video displays the expected content and repeat the preview process, as needed, to find the appropriate video. Selected videos replace the current video for preview.
7. Tap Insert to complete the entry task and apply the video for the slide. The slide refreshes and the Edit and Remove buttons appear allowing you to change the slide contents.
8. Click Save to store the slide contents and continue with the actions to Create and Manage Lessons.
![]()
![]() File: Upload
files from your device. Using the Chrome app, you can add images, PDFs,
and text files. On an iPad, you can add images directly from your camera
roll.
File: Upload
files from your device. Using the Chrome app, you can add images, PDFs,
and text files. On an iPad, you can add images directly from your camera
roll.
To upload a file to a lesson slide:
Depending on your device, the file types and upload steps for lessons differ.
File Types |
||||||
Device |
.gif |
.jpg |
.jpeg |
.png |
.txt |
|
Windows |
x |
x |
x |
x |
x |
x |
Macintosh |
x |
x |
x |
x |
x |
x |
Chromebook |
x |
x |
x |
x |
x |
x |
iPad |
|
x |
|
|
x |
|
Windows, Macintosh, Chromebook Devices
1. Navigate to the appropriate lesson and tap Add Slide. A blank slide appears.
2. Type lesson and slide name titles as appropriate. The titles appear as typed.
3. Tap Upload. The slide appears with a Browse button.
4. Tap Browse and navigate to the file on your device. The contents of the file appear in the slide.
5. Confirm that the file displays the expected content and modify the file as needed.
6. Tap Insert to stop the text entry task and apply the text to the slide. The slide refreshes and the Edit and Remove buttons appear allowing you to change the slide contents.
7. Click Save to store the slide contents and continue with the actions to Create and Manage Lessons.
iPad Device
1. Navigate to the appropriate lesson and tap Add Slide. Your Camera Roll appears
2. Note: You may be prompted to allow access to your camera roll.
3. Tap an image to display in the slide. The image appears in the slide.
4. Confirm that the file displays the expected content and modify the file as needed.
5. Tap Insert to stop the text entry task and apply the text to the slide. The slide refreshes and the Edit and Remove buttons appear allowing you to change the slide contents.
6. Click Save to store the slide contents and continue with the actions to Create and Manage Lessons.
![]()
![]() URL: Add
a link to a website to view the site in the custom lesson.
URL: Add
a link to a website to view the site in the custom lesson.
To add an URL to a lesson slide:
1. Navigate to the appropriate lesson and tap Add Slide. A blank slide appears.
2. Type lesson and slide name titles as appropriate. The titles appear as typed.
3. Tap Add URL. A blank side appears with Enter a Web Site URL field.
4. Type the URL address in the Enter a Web Site URL field and tap GO. The contents of the URL appear in the slide.
5. Confirm that the website displays the expected content and modify the URL address as needed. When available, use URL addresses for a mobile device.
6. Tap Insert to complete the entry task and apply the URL to the slide. The slide refreshes and the Edit and Remove buttons appear allowing you to change the slide contents.
7. Click Save to store the slide contents and continue with the actions to Create and Manage Lessons.
![]()
![]() Text: Type
text content and add formatting features to the text.
Text: Type
text content and add formatting features to the text.
To add text to a lesson slide:
1. Navigate to the appropriate lesson and tap Add Slide. A blank slide appears.
2. Type lesson and slide name titles as appropriate. The titles appear as typed.
3. Tap Add Text and type your text in the slide workspace. The text appears as unformatted text.
4. Apply formatting features to the text using the options located on the formatting tool bar. The text appears according to the formatting features that you apply.
5. Tap Insert to stop the text entry task and apply the text to the slide. The slide refreshes and the Edit and Remove buttons appear allowing you to change the slide contents.
6. Click Save to store the slide contents and continue with the actions to Create and Manage Lessons.
Note: HMH Player uses formatting features common to many applications.
See Also:
©2023 Houghton Mifflin Harcourt. All Rights Reserved.