Before you begin.
. .
Your classes must be created before
you can manage programs. Depending on how your district manages roster
data, classes are created by district/school administrators or by teachers.
To view your class rosters and (if allowed) add classes, see Manage
Class Rosters.
HMH Ed™ requires that teachers specify the programs available for each class before resources can be assigned to a class. Linking HMH programs to classes also ensures that the students only see the programs that you teach within that class.
Linking HMH programs to classes can be done using prompts at log in (as detailed the Set Up Classes at Log In topic) or using the Program Settings page (as detailed in this topic).
➔ View an instructional video by clicking the following link:
Rosters and Program Settings (Video 2:14)
Follow the instructions below to select the programs that you want the students in each class to have access to in their Program List and that you have access to on the Discover page and in the Teacher's Corner.
1. After logging in to Ed, do either of the following:
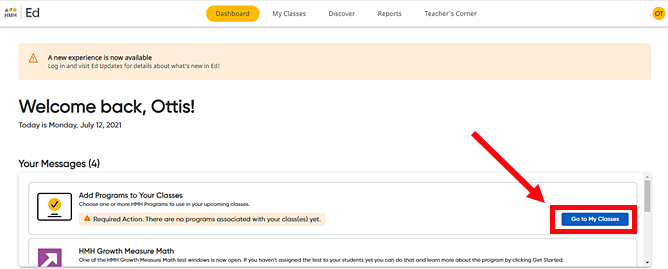
– If you see a notification at the top of Your Messages list on the Dashboard page that no programs associated with any of your classes, click the Go to My Classes button.

Or
– In the Ed banner on any page, click the My Classes tab.
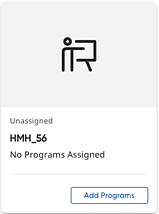
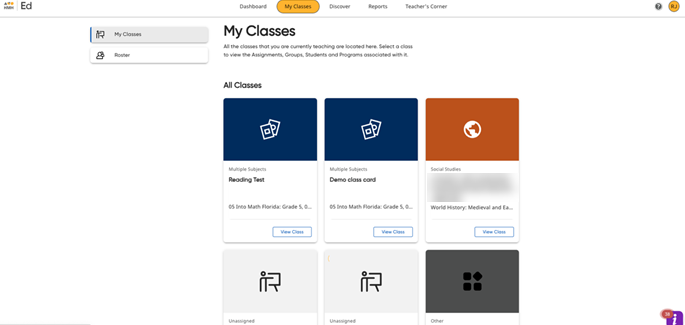
The My Classes page appears with a list of all your classes. If you have not set up programs for any class, you are prompted to do so in the class card.
If you have already selected programs for a class, those programs are listed within the class card.
2. Depending on the class status you are managing, do either of the following:
– To set up programs for a new class, click the Add Programs button.
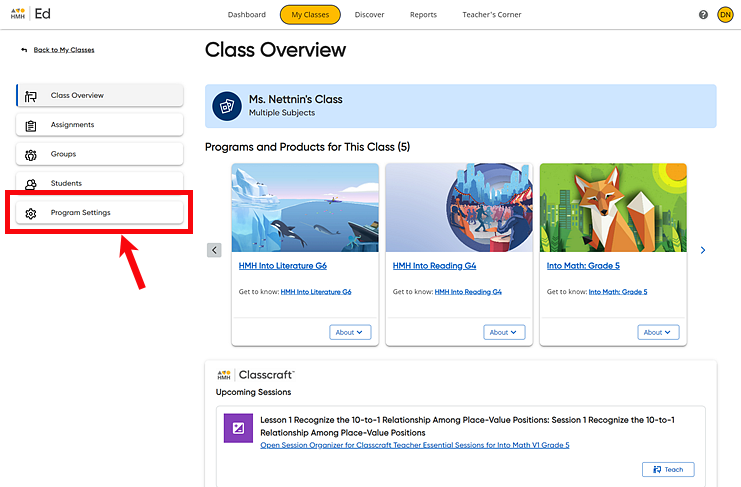
– To add or remove programs to a class, click the View Class button of the class to be managed; the Class Overview page appears. On the left panel, click Program Settings.
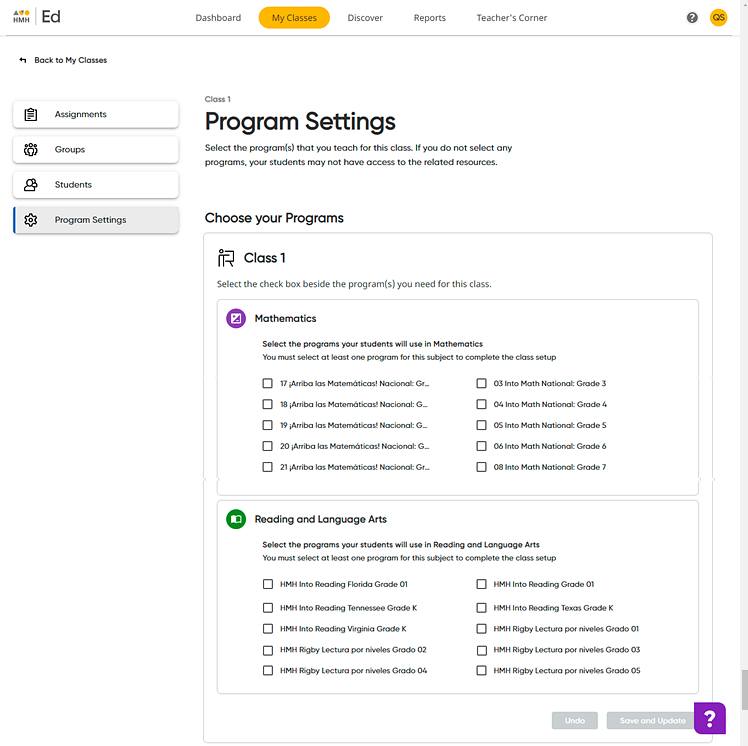
The Program Settings page appears listing all the available programs purchased by your district. Individual programs are displayed in boxes grouped by subject. Each program has a corresponding check box to indicate whether it is selected for this class.
The first time that you open this page for a newly created class, the check boxes for all programs are clear (turned off).
To determine the list of programs that the students in your class see, you need to specify the exact programs to be associated with this class
In the following example, no programs are selected.
3. Select
the check box  of all programs
that the class should have access and, if necessary, clear the check box
 of all programs that the class should not
have access.
The settings are as follows:
On = 
Off = 
In the following example, several programs are selected (turned on) for Class 1.
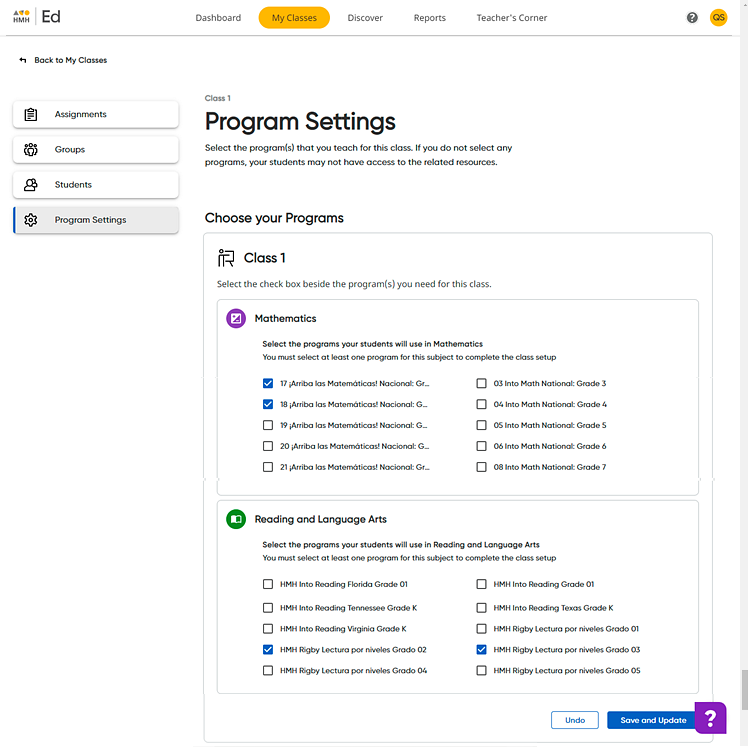
When you make changes on the page, the Save and Update and Undo buttons in the lower right corner of the page are enabled.
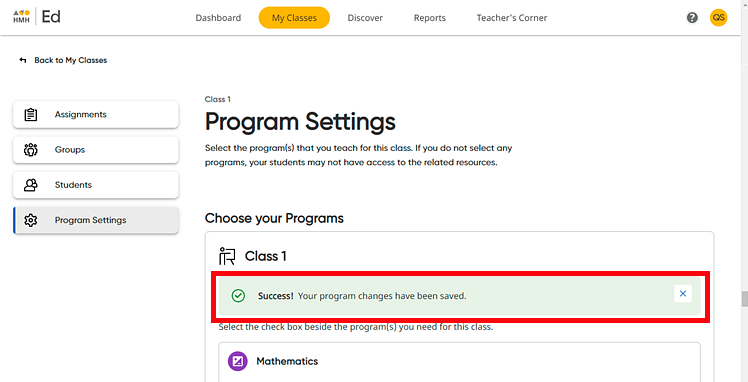
4. Click Save and Update to save the changes. A dialog box appears confirming that you have successfully saved the changes to your programs.
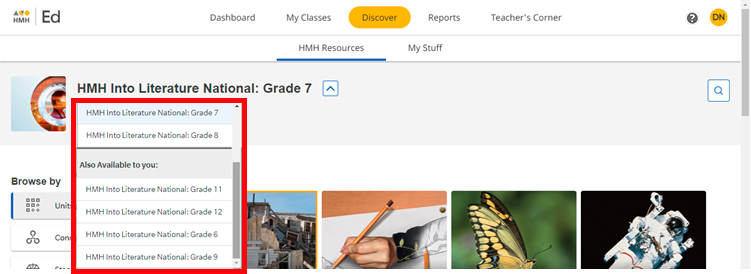
When you return to the Discover page and open the Program List, you see the programs that you selected in the list.
In the Also Available to you section of the Program List, you see additional programs listed that may be above and below the grade-level of the selected program(s). These additional programs are available for you (the teacher) to browse and search, and you can even assign this additional content to the students in your class. However, these additional programs are not included in the Program List that the students in your classes see.
When students log in to Ed, they see only the programs that you associated with their class in their Program List.
Note: To assign any program resources to a class, they must have first been made available to the class on this page or in the set up prompts when you log in. Once a program is selected, its resources, and any resources from programs associated to it and appearing in the Also Available to you section of your program list, can be assigned to the class.
See Also: