Ed, the HMH Learning Platform allows you to create assessment items and add those items to a custom assessment.
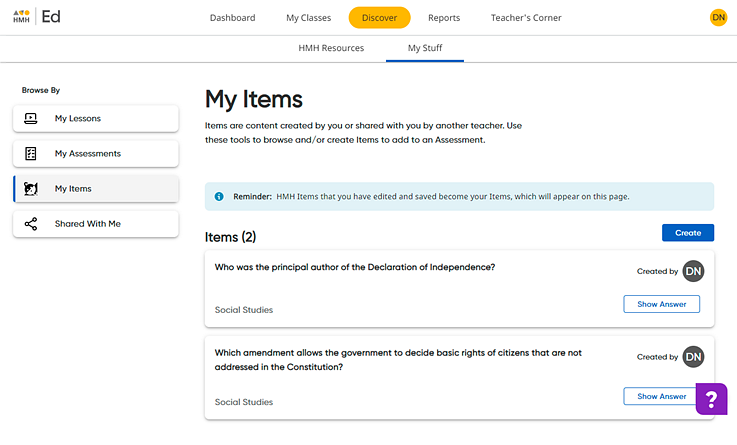
1. Click the Discover tab and My Stuff tab, and then on the left Browse By panel, click the My Items link. If you have any saved assessment items that you have edited or created, they are listed on this page.

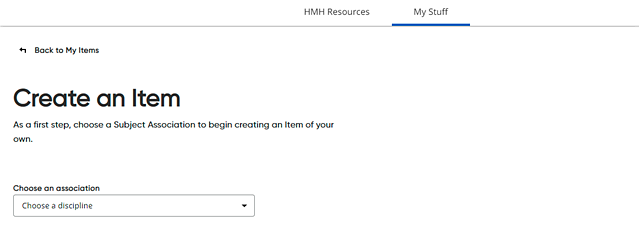
2. Click Create. The Create an Item page appears.

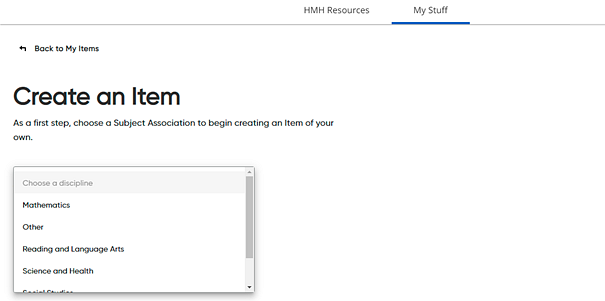
3. If you have access to more than one subject area, select the subject to which the item is to be associated.

4. Select the type of item to be created.

5. Depending on the item type selected, complete the necessary fields as follows:
Item Type |
Action |
Multiple Choice |
a. In the box provided, type the question. b. In the option boxes, type the answer choices. – To
remove an answer choice, click the Remove
attribute button – To
include additional answer choices, click c. If the question allows for more than one answer choice, select the Multiple responses check box. d. If you want the answer choices to be randomly reordered, select the Shuffle options check box. e. In the Set correct answer(s) box, specify the correct answer(s). As you create the item, it displays at the bottom of the page.
|
Choice Matrix |
a. In the box provided, type the question or instructions. b. In the Stems and Options boxes, type the stem statements and answer choice options. – To
remove a stem or an option, click the Remove
attribute button – To
include additional stems or options, click c. If the question allows for more than one answer choice, select the Multiple responses check box. d. In the Set correct answer(s) box, specify the correct answer(s). As you create the item, it displays at the bottom of the page. |
Match Answers |
a. In the box provided, type the question or instructions. b. In the Stimulus list and Possible responses boxes, type the stems and answer choice options. – To
remove a stem or an option, click the Remove
attribute button – To
include additional stems or options, click c. If a single answer choice is allowed for more than one stem, select the Reuse responses check box. d. To show the line connecting the stem to the answer choice, select the Drag handle check box. e. In the Set correct answer(s) box, specify the correct answer(s). As you create the item, it displays at the bottom of the page. |
Fill in the Blanks – Drag & Drop |
a. In the first box provided, type the instructions for the item. b. In
the second box, type the statement to which fill-in-the-blank
options are to be added; in place of the fill-in-the-blank words
or terms, click the
c. In the Possible responses boxes, type the fill-in-the-blank words or terms. – To
remove a possible response, click the Remove
attribute button – To
include additional responses, click d. If a single answer choice is allowed for more than one fill-in-the-blank option, select the Reuse responses check box. e. In the Set correct answer(s) box, specify the correct answer(s). As you create the item, it displays at the bottom of the page.
|
Note: While
editing an item, you can use the  buttons (available
in the upper right corner of the page) to undo or redo actions.
6. Click Save & Done. The newly created item can be viewed in the My Items list on the Create page and can be added to custom assessments. (See Add Items to Custom Assessments for details.)
See Also:
Add Items to Custom Assessments