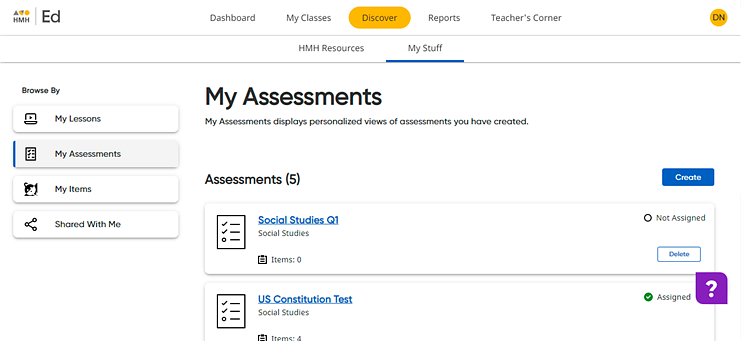
After saving a custom assessment and prior to assigning the assessment, you can select items to add to the assessment. You have the options of adding items from existing assessments as well as items that you have edited or created.
Note: Assigned custom assessments cannot be changed. You can, however, make a copy of an assigned assessment and then add items and edit the duplicate version. See View or Duplicate Custom Assessments for details. |
1. Open an unassigned custom assessment, as follows:
a. Click the Discover tab and My Stuff tab, and then on the left Browse By panel, click the My Assessments link. The My Assessments page appears listing your saved assessments.

b. In the My Assessments list, click the unassigned assessment to which you want to add items. The selected assessment opens.
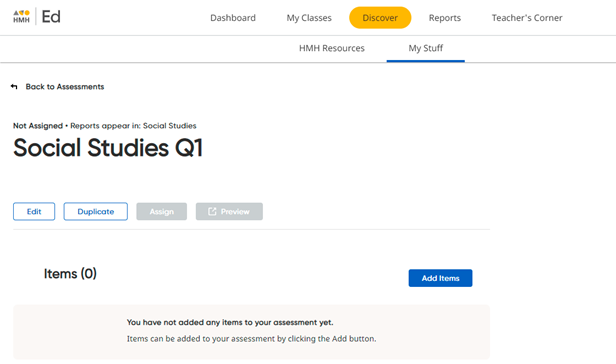
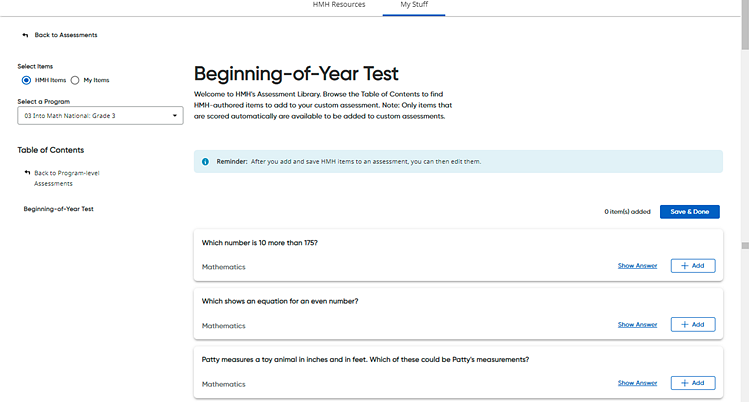
2. Click the Add Items button. The HMH Items page appears.
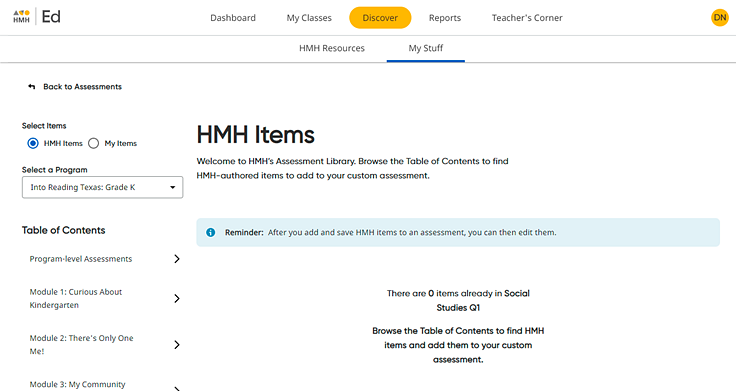
3. Select programs and assessments from which to select items as follows.
– On the left panel, verify that HMH Items is selected. (This is selected by default when the page opens.)
– In the Select a Program field, click in the box to view the program list, and then select a program from the list. The assessments associated with the overall program are displayed on the page, such as benchmark and end-of-year assessments.
– In the Program-level Assessments list, select a program level (module, unit, chapter, or so on) to view the list of assessments for that level. The page updates to display only the selected program-level assessments.
4. Click the item card link for the selected item or assessment.
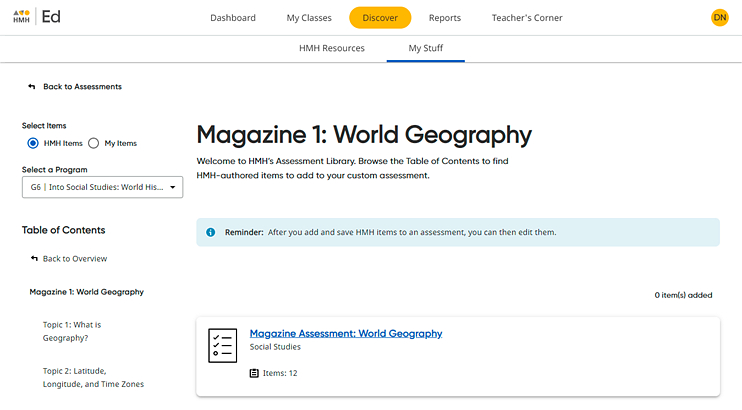
The page updates to display the list of items in the selected assessment, including the item stem (or the item number) for each item.
5. View and select assessment items as follows:
Action |
Steps |
View items and answers |
➔ Click Show Answer. A dialog box opens showing the complete item with the correct answer highlighted. Close the item by clicking the X in the upper right corner.
|
Add items |
➔ Click
Note: The items appear in the assessment in the order in which you select them. The item order can be rearranged after you save the assessment. See Edit Items for Custom Assessments for details.
|
Remove items |
➔ Click Remove. The item is removed from the assessment. |
6. Add items that you have previously edited or created by doing the following:
a. Click My Items. A list of the items that you have edited and created appears.
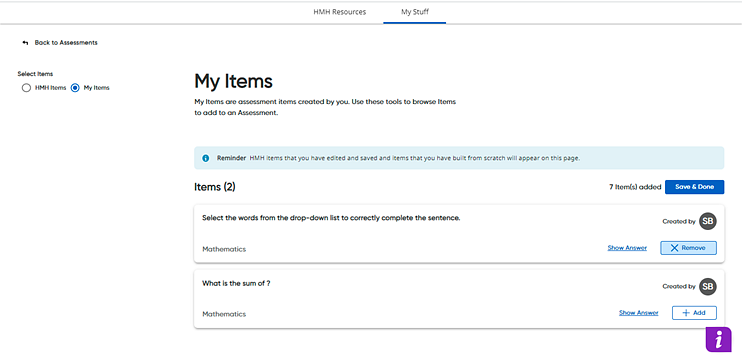
Note: If you have not edited or created any items, then this tab may not appear.
b. For each
item to be added, click  .
The Add button changes to Remove.
c. To remove an item, click Remove. The item is removed from the assessment.
7. Click
 . The selected items are saved to the custom assessment.
The My Assessment page appears and displays all the items you selected
for the custom assessment.
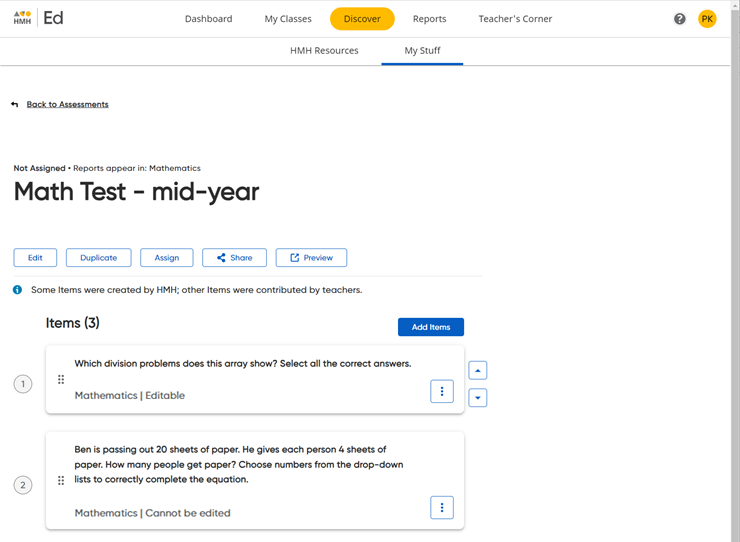
8. Repeat steps 2 through 7 until you have added all the items that you want to include in this custom assessment.
9. Do any of the following:
– Assign the assessment to students. See Assign Custom Assessments for details.
– Open the assessment to view it as students see it. See View or Duplicate Custom Assessments for details.
– Edit the assessment name or description or rearrange the items. See Edit Custom Assessments for details.
– Make changes to any of the editable items that you have added to the assessment. See Edit Items for Custom Assessments for details.
– Share the assessment with other users. See Share Custom Assessments for details.
See also:
View or Duplicate Custom Assessments