An HMH Player lesson is a collection of slides and there are two types of lessons that you can create in HMH Player. You can create a lesson using existing HMH lessons that contain original copyright-protected content from the publisher or you can create a lesson with images, video, files, web URLs, and text that you add to slides to create the lesson. Note that you cannot modify the contents of an HMH lesson but you can use HMH lessons to create a lesson.
Once you create a lesson, using HMH content or original content, these lessons are known as Custom Lessons. You cannot download custom lessons for offline use.
Note: At this time, you can use only math programs to create custom HMH lessons.
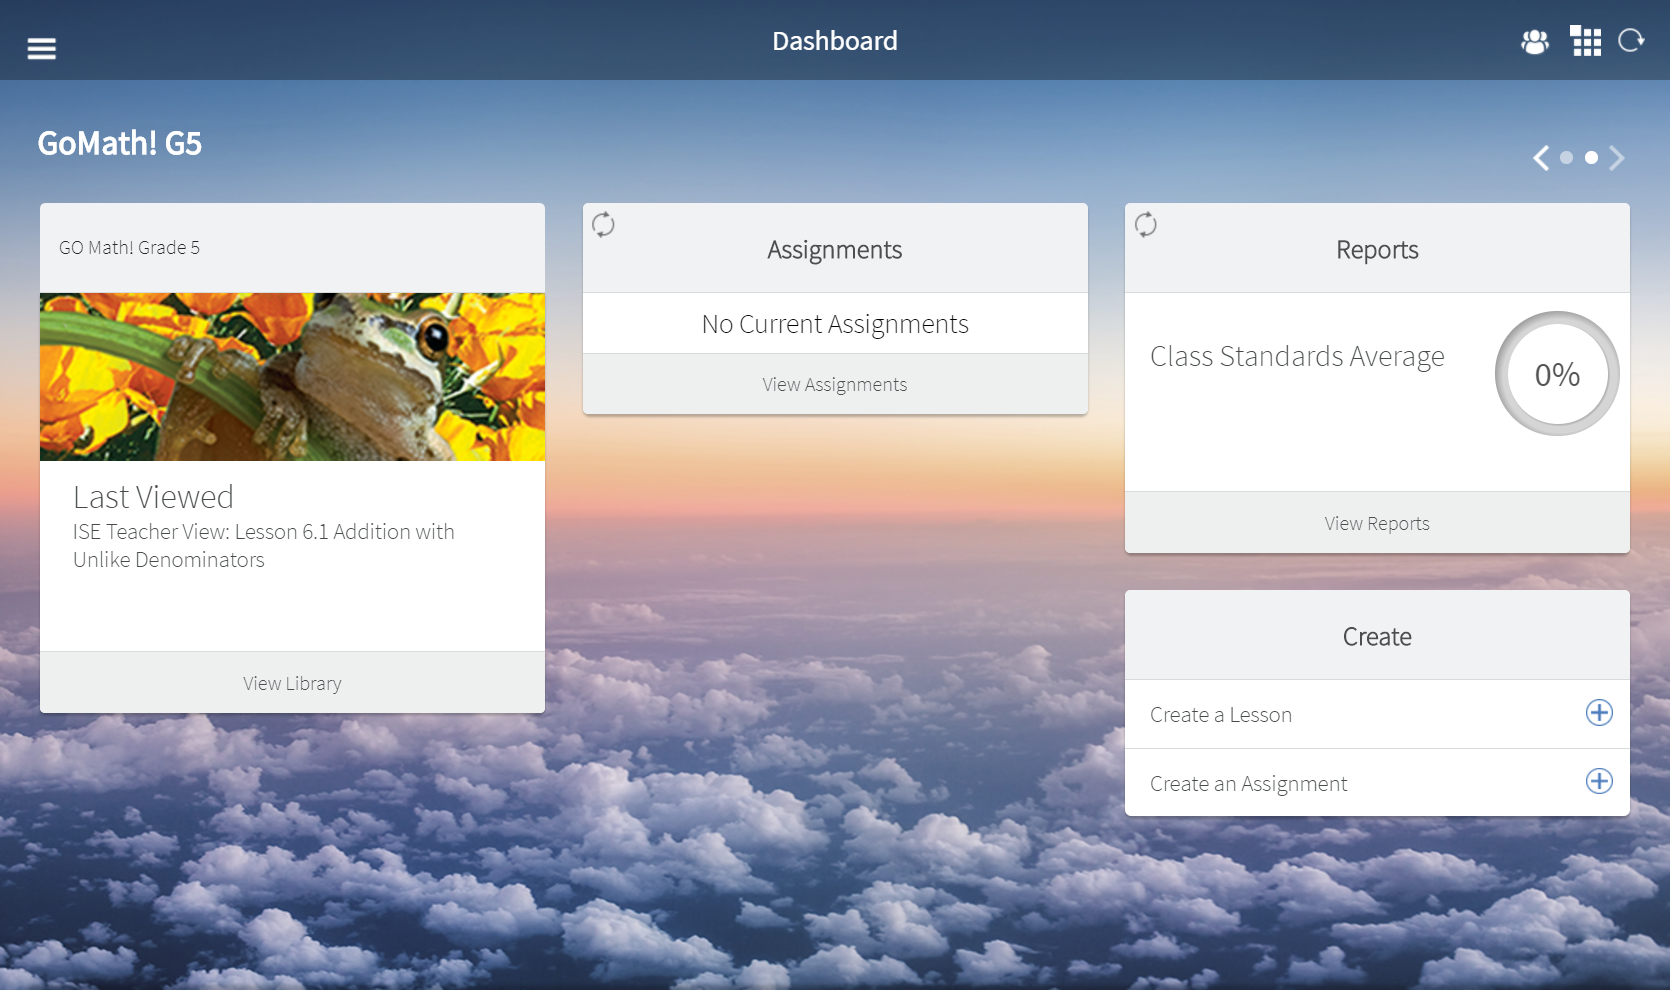
1. From the HMH Player dashboard, navigate to the class that you will use for the custom lesson. The lesson appears.
2. On the Create card, tap Create a Lesson. The Custom Lesson page appears.
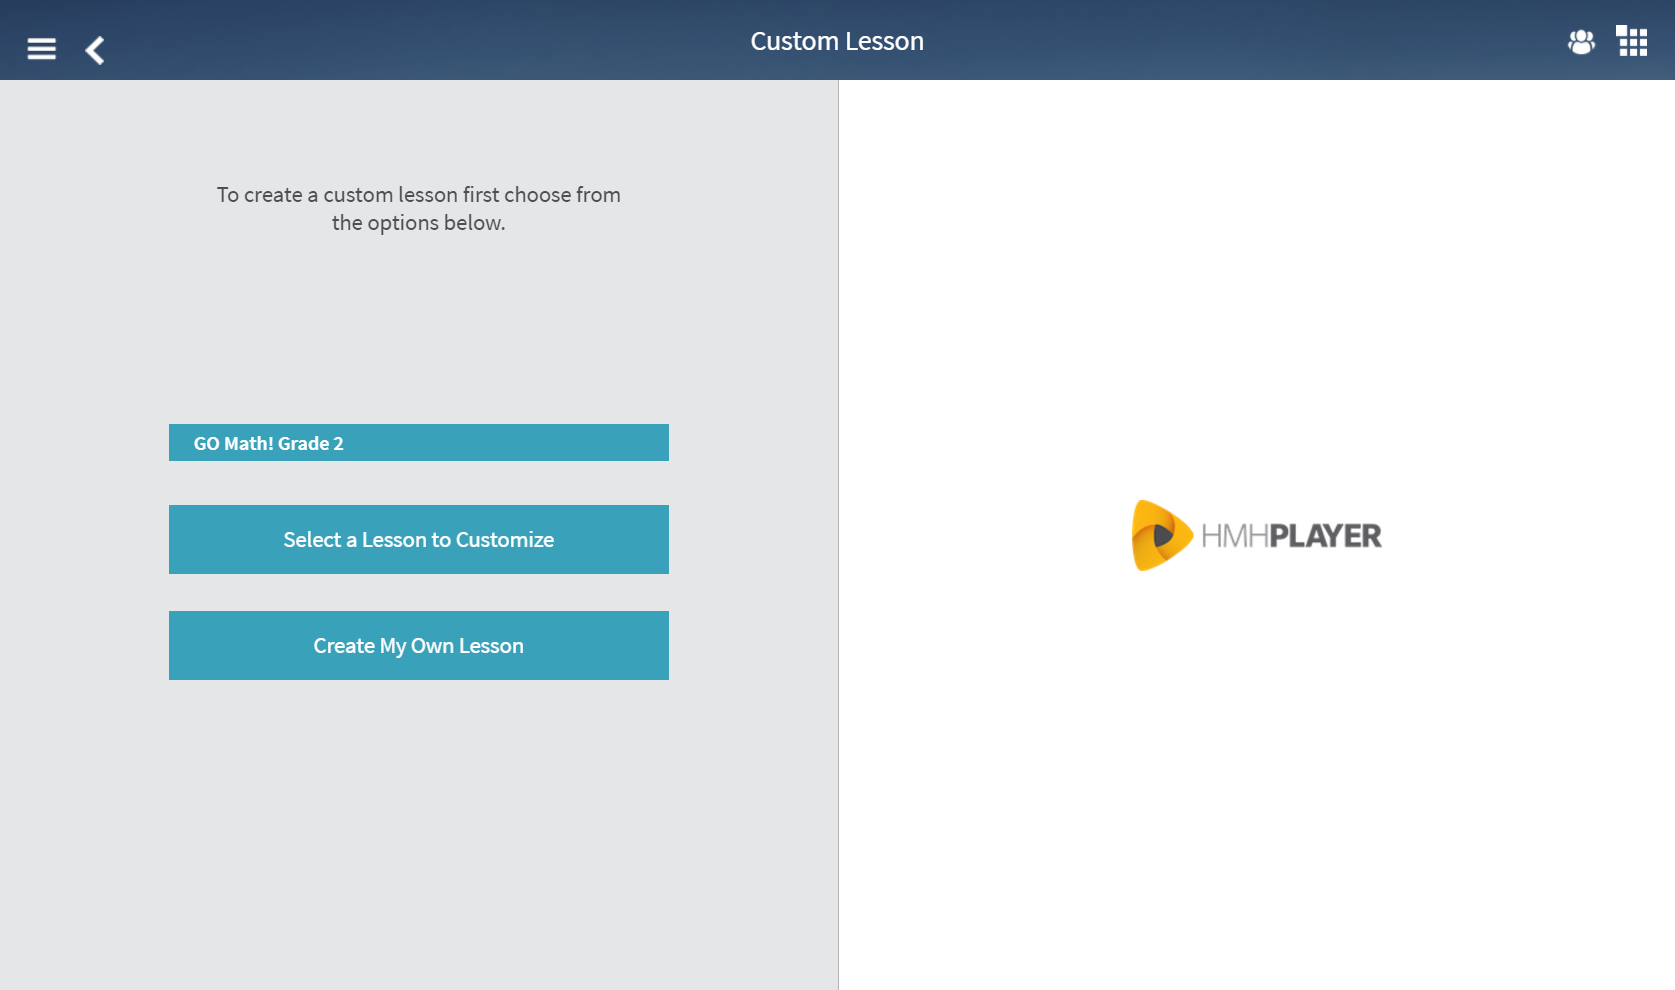
3. Tap the lesson type to create. Depending on your selection, the corresponding Custom Lesson page appears.
Use an existing HMH lesson:
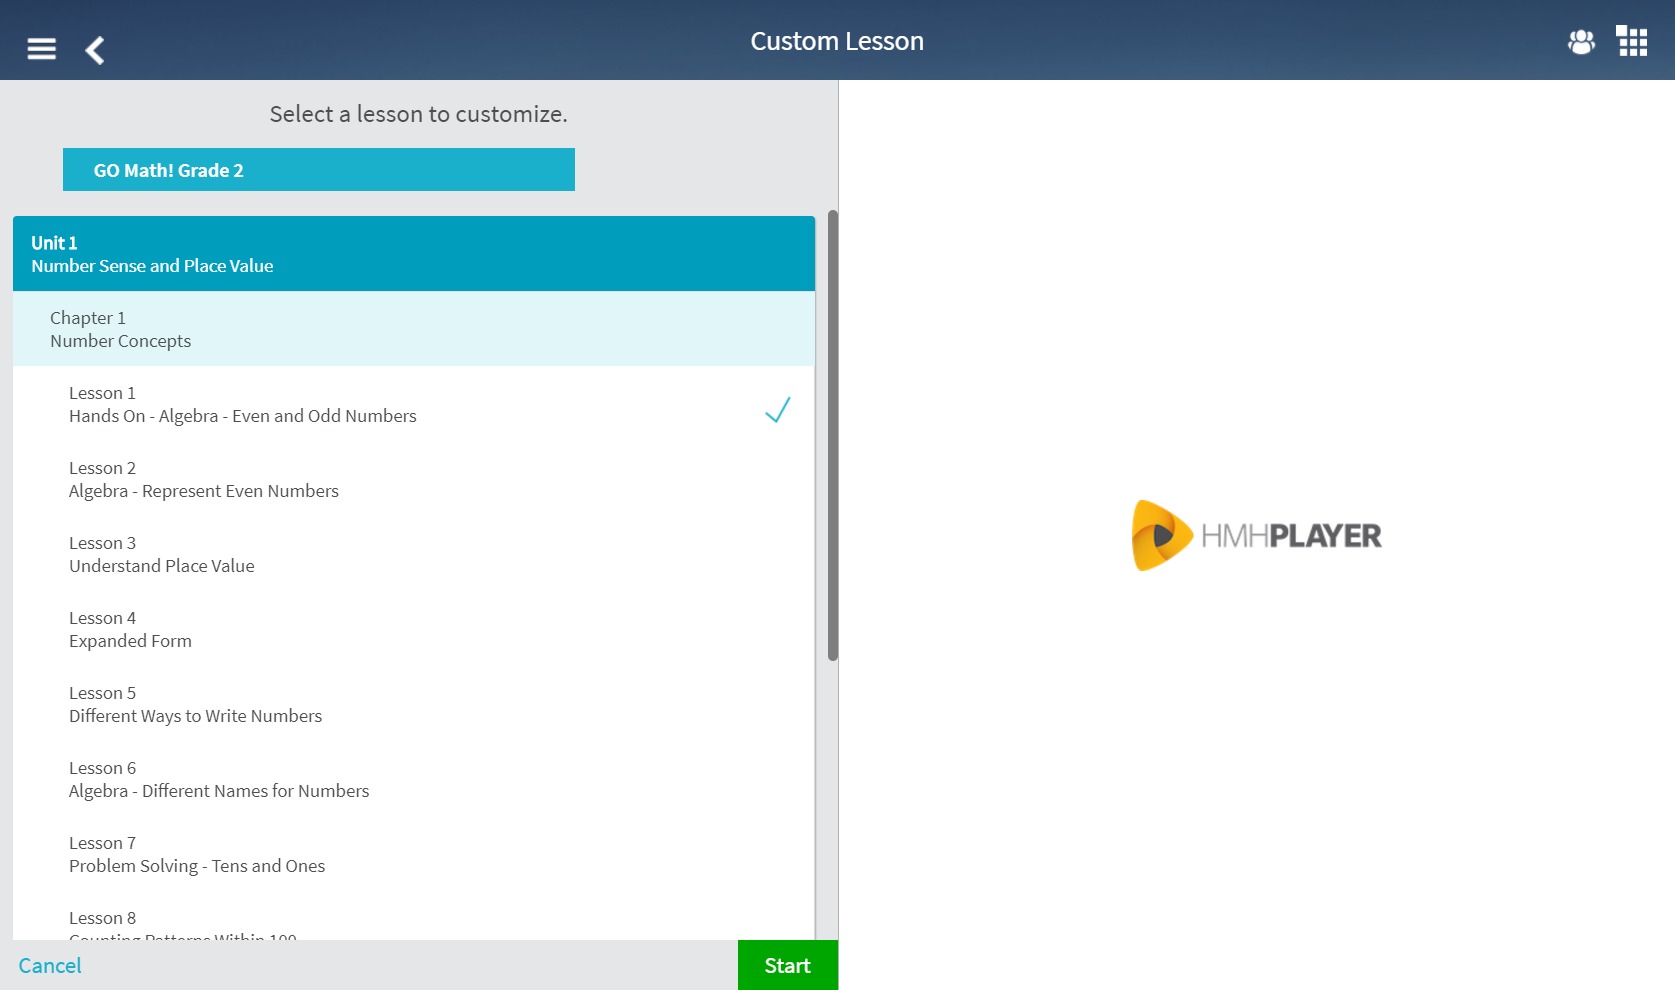
a. Tap Select a Lesson to Customize. If the class contains more than one program, use the drop-down menu to select the appropriate program. The program table of contents appears.
b. Navigate
to the appropriate lesson-level content and tap the lesson to customize.
A check mark  appears next
to the selected lesson and the Start
button is enabled.
appears next
to the selected lesson and the Start
button is enabled.
Use non-HMH content:
a. Tap Create My Own Lesson. The Custom Lesson page refreshes with a field to allow you to name the lesson.
b. Tap inside the Please Enter a Lesson Title field to type the name of the lesson and type outside the field to accept the name. The title name appears as appropriate.
1. Tap Start. The selected lesson appears.
2. Tap inside the title field to edit the title name and tap outside the field to accept the name. The title name appears as appropriate.
3. Tap the Add icon to create a new slide in the lesson.
4. Tap inside the Enter a Slide Title field to assign a name to the slide. The cursor is positioned at the beginning of the field.
5. Type a name for the slide title and tap outside of the title field to accept the title name. The slide title appears as typed.
6. Enter content on the slide using the following options. Content appears on the slide depending on your selection.
Area |
Feature |
Description |
|
Add Image |
Find and add images from the Internet. The HMH Player image search is powered by Bing image. |
|
Add Video |
Discover videos to embed in your lesson using YouTube video search. |
|
Upload Files |
Upload files from your device. Using the Chrome app, you can add images, PDFs, and text files. On an iPad, you can add images directly from your camera roll. |
|
Add a Link |
Add a link to a website to view the site in the custom lesson. |
|
Add Text |
Type your own text content and add formatting to enhance the text. |
7. Tap Insert to add the slide to the lesson table of contents. The slide is added to the lesson.
8. Continue to add slides as needed to complete your lesson. The slide names appear in the class table of contents in the order created. Once you complete the slides, you can change the order of the slides in the presentation.
9. Tap Move to the right of a slide name to change the slide order. Use a drag and drop action to move the slide to a new position in the list order. The slides appear in the new order.
To save and publish customized lessons:
a. Tap Save to store the custom lesson once you complete the slide creation. The Custom Lesson page appears.
b. Tap Publish for Students or Save Custom Lesson Only. Depending on your selection, you complete additional steps to save or allow access to the material.
Publish for Students: Once you complete all edits to a lesson, this option allows students to access the custom lesson.
a. From the Custom Lesson page, navigate to the lesson-level where you need to place the custom lesson. The class table of contents panel appears.
b. Tap Publish. A confirmation dialog appears indicating that your lesson was published.
c. Tap Done. The class table of contents appears with the custom lesson listed.
Save Custom Lesson Only: This option allows you to continue to edit a lesson at a later time.
➔ Tap Done. The class table of contents appears.
See Also: