The Add Class page allows you to create and manage classes, add products to be available to the class, and assign students to a class.
➔ View the Add Classes quick reference guide by clicking the link below.
Add Classes (PDF 440 Kb)
➔ To edit the details, students, or products of an existing class, see Edit Classes.
Note: District administrators can add multiple classes, students, and products using the data import process. District administrators can also lock down data permissions for schools, and thus, prevent teachers from managing users and classes. If you do not have access to add or edit classes, the data permissions for these options are locked by your district, so you must contact your administrator to request updates.
1. Refer to the following table to begin.
Location |
Action |
Dashboard |
a. In the upper left corner of the page, click Manage Classes. The Manage Classes page appears. b. In the lower right corner, click the Add Class... button. |
Any ThinkCentral banner page |
➔ In the top menu bar, click the Classes tab, move to the Add area, and then click Class. |
The Add Class page appears.
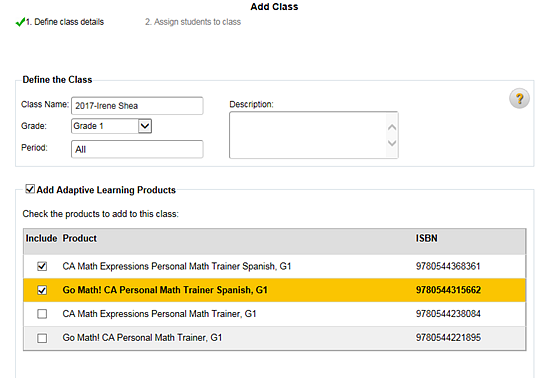
2. In the Define the Class area, type the following:
– Class Name – The following rules apply to the Class Name field:
○ Maximum characters: 75
○ Valid values: A–Z, a–z, 0–9, spaces, and the following supported symbols acceptable: !#$%&'()*+,-./:;<=>?@[]_` {|}~\¡¢£¤¥¦§¨©ª«¬-®¯°±²³´¶¸¹º»¼½¾¿ÀÁÂÃÄÅÆÇÈÉÊËÌÍÎÏÐÑÒÓÔÕÖ×ØÙÚÛÜÝÞàáâãäåæçèéêëìíîïðñòóôõö÷øùúûüýþ
○ Class names must be unique within teacher's list of classes.
Tip: For best results, review the Class Names Tips topic.
– Grade – Select the grade level for the class.
– Period (Optional) – The following rules apply to the Period field:
○ Maximum characters: 25
○ Valid values: A–Z, a–z, 0–9, spaces, and the following supported symbols acceptable: !#$%&'()*+,-./:;<=>?@[]_` {|}~\¡¢£¤¥¦§¨©ª«¬-®¯°±²³´¶¸¹º»¼½¾¿ÀÁÂÃÄÅÆÇÈÉÊËÌÍÎÏÐÑÒÓÔÕÖ×ØÙÚÛÜÝÞàáâãäåæçèéêëìíîïðñòóôõö÷øùúûüýþ
– Description (Optional)
Note: You may click Save at any time, and then return to the class to edit or add products and students.
3. Click the Add Adaptive Learning Products check box to view available Personal Math Trainer (PMT) products, and click the check boxes to add products to the class.
Important: Adaptive Learning Products includes PMT products. For these PMT products to be available for class assignment, you must add them on this Add Class page or on the Edit Class page.
4. (Optional) In the Define the Library area, filter the list of products by doing the following:
a. In the Grade list, click the check boxes of any additional grade level(s) for which products may be needed.
Note: The grade level associated with the class is automatically selected, and products associated with this grade level are listed. To support your class, you may need products associated with lower grade levels or higher grade levels. This feature allows you to select from products associated with other grade levels.
b. In the Language list, select a language by which to filter products.
c. Click the Apply Filters button. The free play products that match your selected filter criteria are listed.
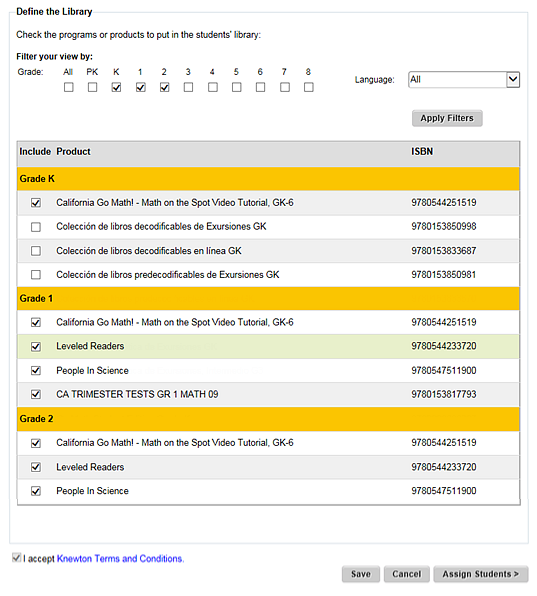
5. From the list of free play products, select the check boxes of the products to be made available to the class.
Note: Products may be automatically selected, depending on how resources are activated within your district.
6. Select the I accept Knewton Terms and Conditions check box.
7. Refer to the following table to continue.
Do you want to add students to the class now? |
Then follow these steps: |
No: I prefer to add students at another time. |
Click the Save button. The class is saved, and the Add Classes page continues to display. The newly added class is listed on the Manage Classes page. When you are ready to add students to this class, you can do so on the Edit Class page. (See Edit Classes for details.) |
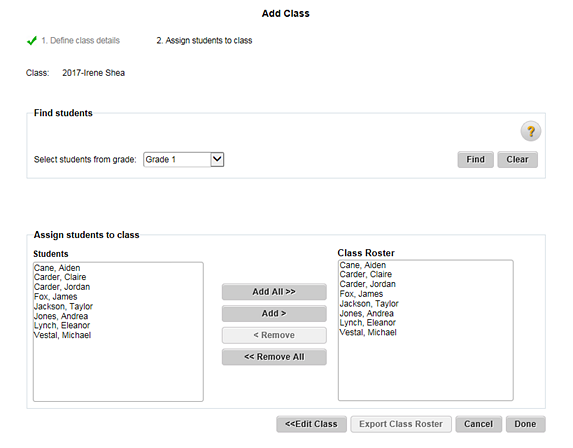
Yes: I want to add students to the class now. |
a. Click the Assign Students > button. The Assign students to class page appears. b. If necessary, filter the student list by selecting the grade and then clicking Find. c. In the Assign students to class area, use the Add All >>, Add >, < Remove, and << Remove All buttons to select the student(s) to be added. As you select student(s), the names move from the Students box to the Class Roster box. ○ To select multiple students, hold down the Ctrl key or Apple key on your keyboard and click the students; with all selected students highlighted, click Add >. ○ To select multiple students listed consecutively, click the first student in the list, hold down the Shift key, and then click the last student in the list; the first, last, and all students in between are highlighted. Click Add >.
Note: To return to the previous page (if you need to edit class name information or products available to the class), click the Done button, and then click the <<Edit Class button. If you return to the previous page before clicking the Done button, then the class roster updates on this page are lost.
d. Click Done. A confirmation dialog box appears. e. Click OK. The Manage Classes page appears with your newly added class listed in the My Classes area. |
Note: You can update the class details, assigned students, and the products available to the class at any time on the Edit Class page. (See Edit Classes for details.)
See Also: