Administrators can add new or update existing school, class, and/or user data using an import file.
Note: Before importing records,
verify with your district administrator that your administrator account
has sufficient permissions to import records to HMH Ed™.
Notify teachers of plans to use the import management tool; user accounts
that are added or updated manually by teachers may become out of sync.
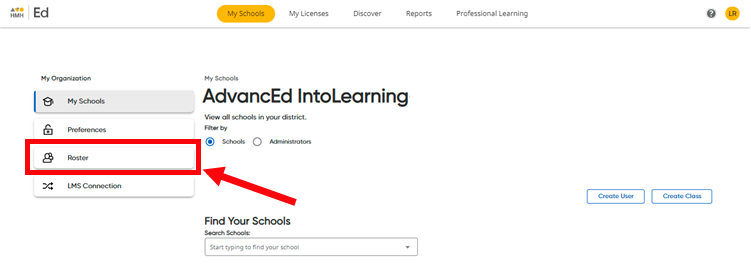
1. On the left panel of the My Schools page, click Roster.
The Roster Dashboard page appears displaying information about previous roster imports, if applicable.
2. Note the following about roster options available:
– HMH recommends that all districts use the Common Rostering features that improve security, data quality, and automation to your SIS.
– If you prefer to do CSV imports, such as Quickroster (Ed only) or manual entry, details are provided below and instructions are provided in the table in Step 4.
Quickroster
– This option works
for small districts or districts that use want to add Ed
user accounts in bulk and allow teachers to manage their classes on their
own. (Note that the Quickroster option
is located within the Manage Common Rostering selection.)
Additional notes about Quickroster:
○ If you are using Quickroster and need to delete or purge data, go through the Advanced rostering option to clear the site first (upload a blank SFF file) and then return to upload your Quickroster.
○ Quickroster allows you to add and update only, not delete.
○ Quickroster matches on the LASID field for updates.
○ Quickroster is delta-based (not bulk); for example, if you add 50 users today and 5 tomorrow, you will have 55 users on the site.
○ Quickroster does not work for NWEA data or legacy platforms such as ThinkCentral and Holt McDougal Online.
Manual – This option is used for organizations that want to add user accounts and classes one at a time. This option can allow administrators and/or teachers to be responsible for setting up all or part of their rosters within Ed.
3. On the Roster Dashboard, click the Roster Actions button to see available options.

– Manage Common Rostering – This is the recommended rostering option to used by organizations that maintain large databases often managed by a SIS vendor. (Note that this selection also leads you to the Quickroster option; see details in the table below.)
– Manage SSO Configuration – Select this option if your organization
uses single sign on (SSO); this allows you to manage your SSO settings.
For complete details, see Edit
Single Sign On Settings.
4. Depending on your roster option, proceed as follows:
Roster Option |
Steps |
Common Rostering |
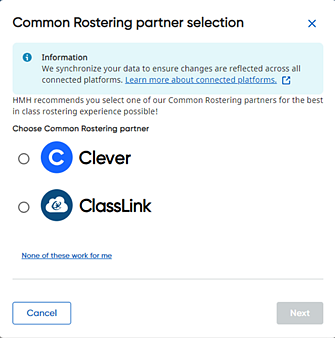
a. Click the Roster Actions button and select Manage Common Rostering. The Common Rostering partner selection dialog box appears.
b. Do one of the following: – (Recommended) Select Clever or ClassLink and then click the Next button. The rostering wizard opens.
– Click the bottom link: None of these work for me. The Advanced Roster dialog box appears. In the Student Information System list, select one of the alternate SIS options and then click Next.
The Import Management tool opens in a new browser window.
c. Click here to open Import
Management online help
|
a. Click the Roster Actions button and select Manage Common Rostering. The Common Rostering partner selection dialog box appears.
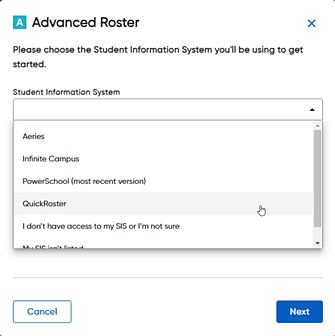
b. Click the bottom link: None of these work for me. The Advanced Roster dialog box appears.
c. In the Student Information System list, select QuickRoster and then click Next.
The Quickroster dialog box appears.
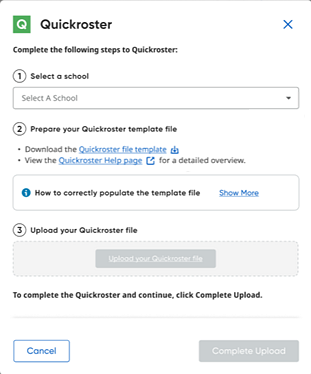
d. In the School list, select the school for which you want to upload a roster.
e. If necessary, click to download the Quickroster file template.
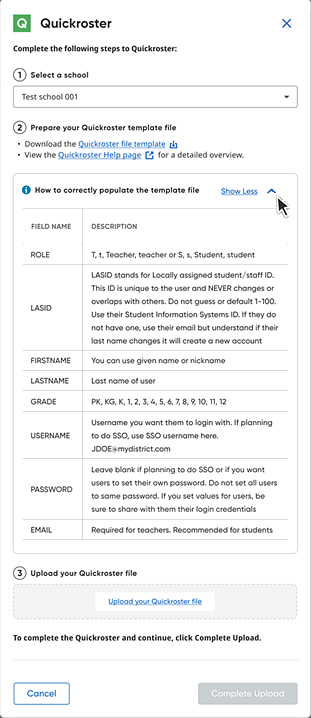
f. Review file and field requirements, field-level instructions, and accepted values and populate your Quickroster file. Click the Show More link to view template fields and descriptions or click to see the Set Up a Quick Roster topic for further details.
g. Click to locate and upload your Quickroster file.
h. Click Complete Upload. The file is uploaded and the user data in the file is available in Ed. |
|
Manual |
a. In the HMH Ed banner, click the My Schools tab. The My Schools page appears.
b. Add user accounts for students and teachers, as needed. (See Add a New Student, Add a Teacher, Add a New Class.)
c. If
necessary, direct your teachers to add students and classes. (See
Ed Teacher Help: Add a New Student |
See Also: